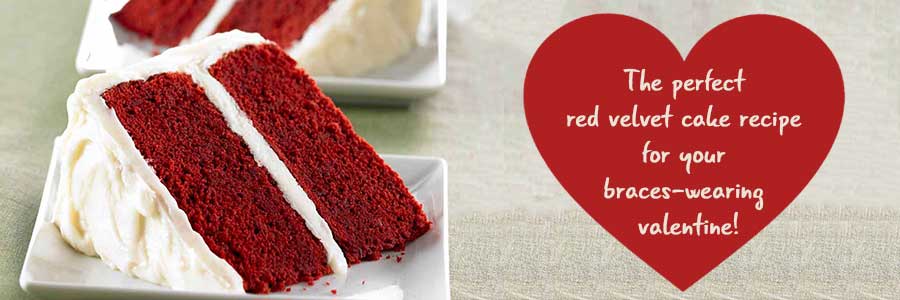
With Valentine’s Day drawing near, it’s the perfect time to add another sweet treat to our braces friendly recipe collection. And with its vibrant red color and classic flavor, we thought a red velvet cake recipe would be the perfect choice.

It’s not hard to find a cake recipe that someone with braces can eat. In fact, most cakes are braces friendly, provided they don’t have nuts, caramel or other hard/crunchy/sticky ingredients. But finding a really good red velvet cake recipe isn’t always as easy—in our experience, they tend toward dry and bland more often than not.

With that in mind, we scoured the internet to find the perfect red velvet cake recipe to share with you today, and with an average rating of 4.7 out of 5 stars from over six hundred (!) reviewers, this recipe from Divas Can Cook, um, takes the cake. 😀

Moist? Check!

Flavorful? Check!

Easy? Check!

We modified the recipe slightly and paired it with a killer cream cheese frosting, and we’re certain this decadent duo will have your sweetheart swooning!

If you decide to try this red velvet cake with cream cheese frosting recipe, let us know if you like it in the comments. And while everyone should remember to brush or at least rinse after indulging, it’s even more important for orthodontic patients to do so in order to prevent plaque from building up under the braces.

With that said, enjoy! And Happy Valentine’s Day from everyone at Vancouver Orthodontic Specialists, PLLC!

Red Velvet Cake with Cream Cheese Frosting

Print Braces friendly red velvet cake with cream cheese frosting
Ingredients
  • For the cake:
  • 2 cups all-purpose flour
  • 1 teaspoon baking soda
  • 1 teaspoon baking powder
  • 1 teaspoon salt
  • 2 Tablespoons unsweetened cocoa powder
  • 2 cups sugar
  • 1 cup vegetable oil or canola
  • 2 eggs
  • 1 cup buttermilk
  • 2 teaspoons vanilla extract
  • 1-2 oz. red food coloring, depending on how deep you want the color
  • 1 teaspoon white distilled vinegar
  • ½ cup hot water
  • For the frosting:
  • 1 cup (2 sticks) unsalted butter, softened (do not soften in microwave)
  • 3 8 oz packages full fat cream cheese cut into 1 inch pieces and softened (not in microwave)
  • 3 cups powdered sugar
  • 2 teaspoons vanilla extract
Instructions
  • Preheat oven to 325 F.
  • Generously grease and flour (2) 9-inch round cake pans. Set aside.
  • In a medium bowl, whisk together flour, baking soda, baking powder, cocoa powder and salt. Set aside.
  • In a large bowl, combine the sugar and vegetable oil.
  • Mix in the eggs, buttermilk, vanilla and red food coloring until combined.
  • Stir in the hot water and white vinegar.
  • Combine the wet ingredients with the dry ingredients a little at a time, mixing after each addition, just until combined (batter will be thin).
  • Pour the batter evenly into each pan.
  • Bake in the middle rack for 30-40 minutes or until a toothpick inserted in center comes out with moist crumbs clinging to it. Do not over bake as cake will continue to cook as it cools.
  • Let pans cool on a cooling rack until the pans are warm to the touch.
  • Slide a knife or offset spatula around the inside of the pans to loosen the cake from the pan.
  • Gently remove the cakes from the pan and let them finish cooling (the warm cake will be very delicate).
  • Make the frosting: Add the butter to your mixing bowl and mix until smooth; add the powdered sugar and vanilla and beat on medium speed 2-3 minutes (longer if using a hand mixer) until light and fluffy, scraping the bowl mid way through. Add the pieces of cream cheese to the mixing bowl and beat on low/medium speed about 1 minute or until the cream cheese is blended in.
  • Frost the cake with the cream cheese frosting when the cakes have cooled completely.
Tips
  • Check cakes at 30 minutes to avoid over-baking.
  • Cakes may need to be refrigerated to firm up before stacking and frosting as they are extremely moist.
  • To make cupcakes, bake for 18-20 minutes, checking at 18 minutes.
  • If frosting is beaten too long it may become too soft; refrigerate until firm.

Leave a Reply

Your email address will not be published. Required fields are marked *